Banners
You can create banner ads to promote internal and external campaigns and target them at 'banner slots'.
Adding banner slots is covered under Pages
The following will show you how to schedule your banner ad availability, target banner ads at different markets, use categories to ensure they show in the right place and add links and images.
Creating a Banner
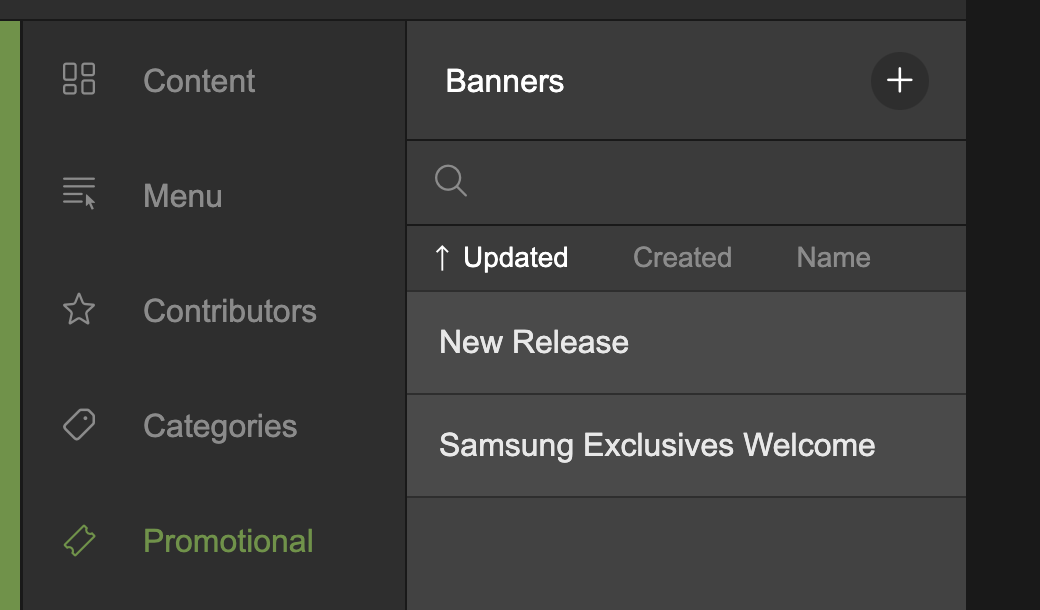
- Click Promotional in the left main menu
- Within the "Promotional" menu, select the "Banners" option.
- Click on the + icon on the selected Banners option.
- After clicking the plus icon, an overlay will appear on the screen. In this overlay, enter a name for the banner in the designated field. Best to choose a descriptive and easily recognizable name.
- Click on the "Create" button in the overlay. This will create the new banner.
- You can now proceed to customize and configure the details of the newly created banner, such as adding images, setting URLs, defining durations, and selecting target audiences.
Click the + icon on Banners to create a new banner
Scheduling and Markets
- Select a banner ad from the Banners menu and click on Availability and Market to expand the section.
- Set the Visible From date and time by clicking on it and selecting the desired date and time from the calendar.
- Set the Visible To date and time by clicking on it and selecting the desired date and time from the calendar.
- In the Market dropdown menu, select an existing market from the options provided.
- This will ensure that the banner ad is only available to the target market user group during the specified dates.
- By default, the market is set to 'All Customers', which means the banner will be seen by all users unless the market is changed to a specific target group.
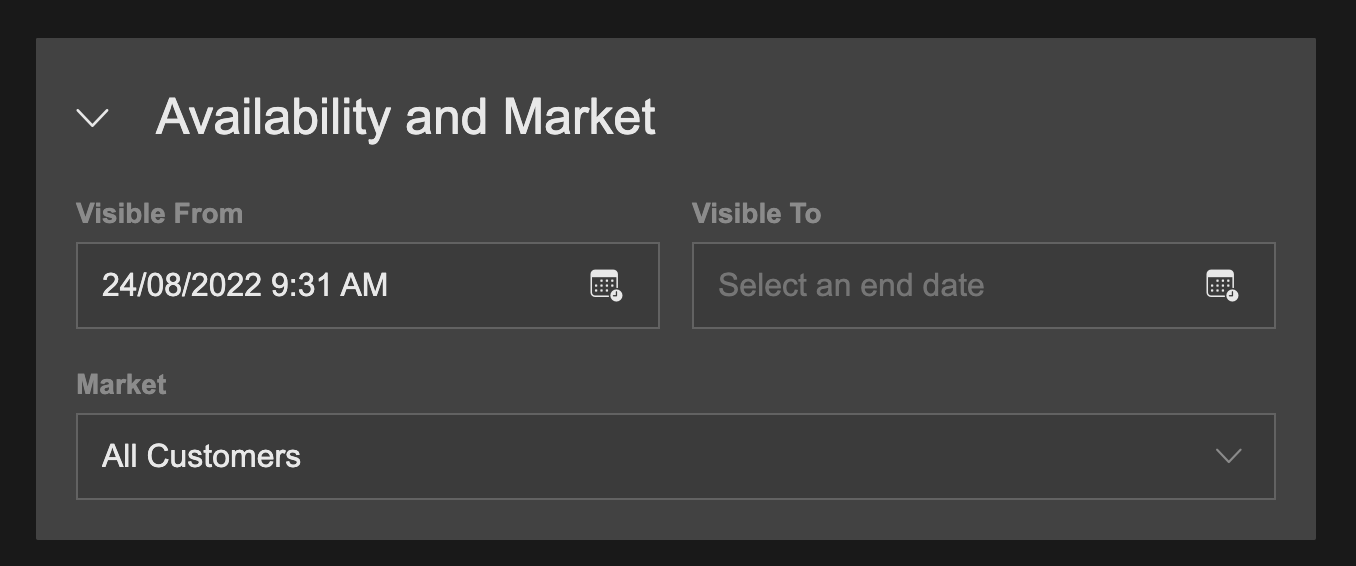
Set an availability date for your banner and select a target market
Managing Banner Ad Categories
- Click the Categories section to expand it.
- Open the Categories menu on the left and drag and drop a category onto the banner ad Categories section.
- Clicking Show Categories Menu is a quick way of displaying categories menu on the left.
- Once a category has been added to the banner ad, you will see a number displayed next to it. This number represents the category weighting, which affects how likely it is the banner will be displayed in a targeted banner slot.
- To adjust the category weighting, click on a category to expand it.
- Within the expanded category, you will find a slider. Drag this slider to increase or decrease the weighting. The options range from "Never Show" through a scale of 1-5, and then "Very Likely" being the highest weighting.
- To remove a category from the banner, simply hover over the category and a Remove button will appear. Click on the 'Remove' button to remove the category from the banner.
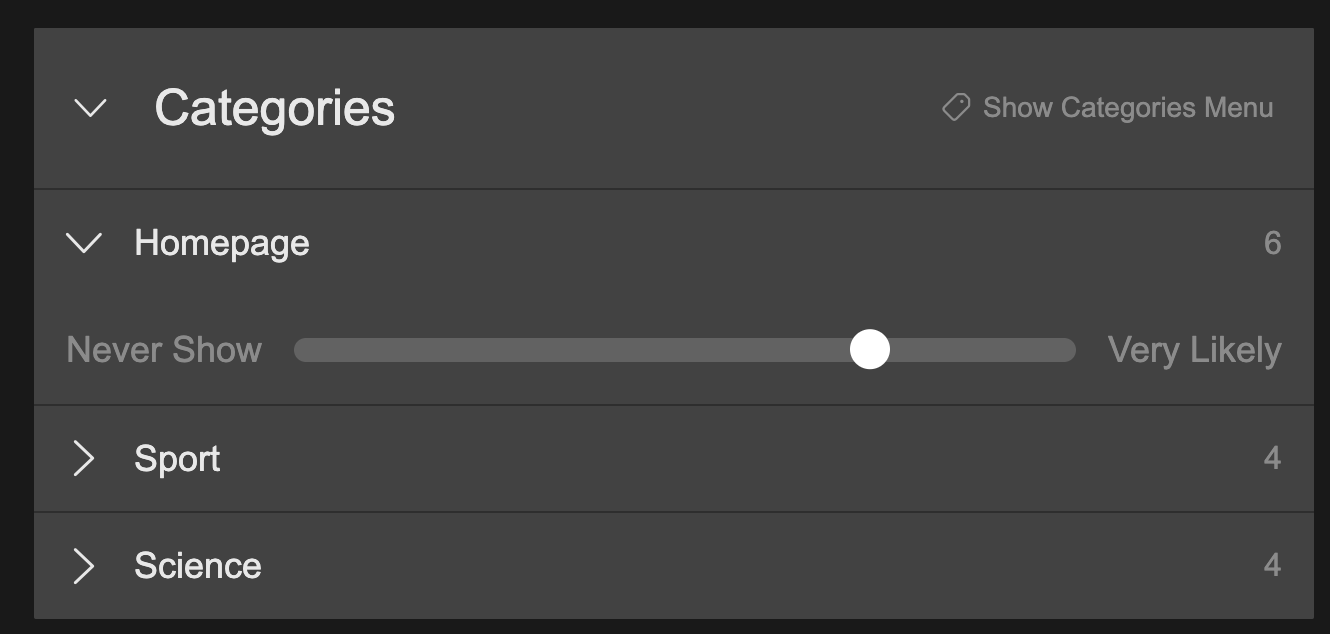
Set the weighting of a category
Adding Banner Images
This guide provides instructions on how to add, manage, and customize Image Sets using drag and drop functionality. Image Sets allow you to create multiple sizes of images, each with different cropped ratios particular to screen size and device. You can then utilize these images in various banner slots, selecting the appropriate size based on your preference.
Adding an Image Set Master Image
To add an Image Set Master image, follow these steps:
- Click the images section to expand it.
- Drag and drop an image onto the images section.
Once the image is added, the system will automatically generate several sizes for the image, including small, medium, large, and extra large. Each size has different cropped ratios:
- Small: 10:1, 5:1
- Medium: 6:1, 3:1
- Large: 3:2
- Extra Large: 2:1, 16:9, 6:9
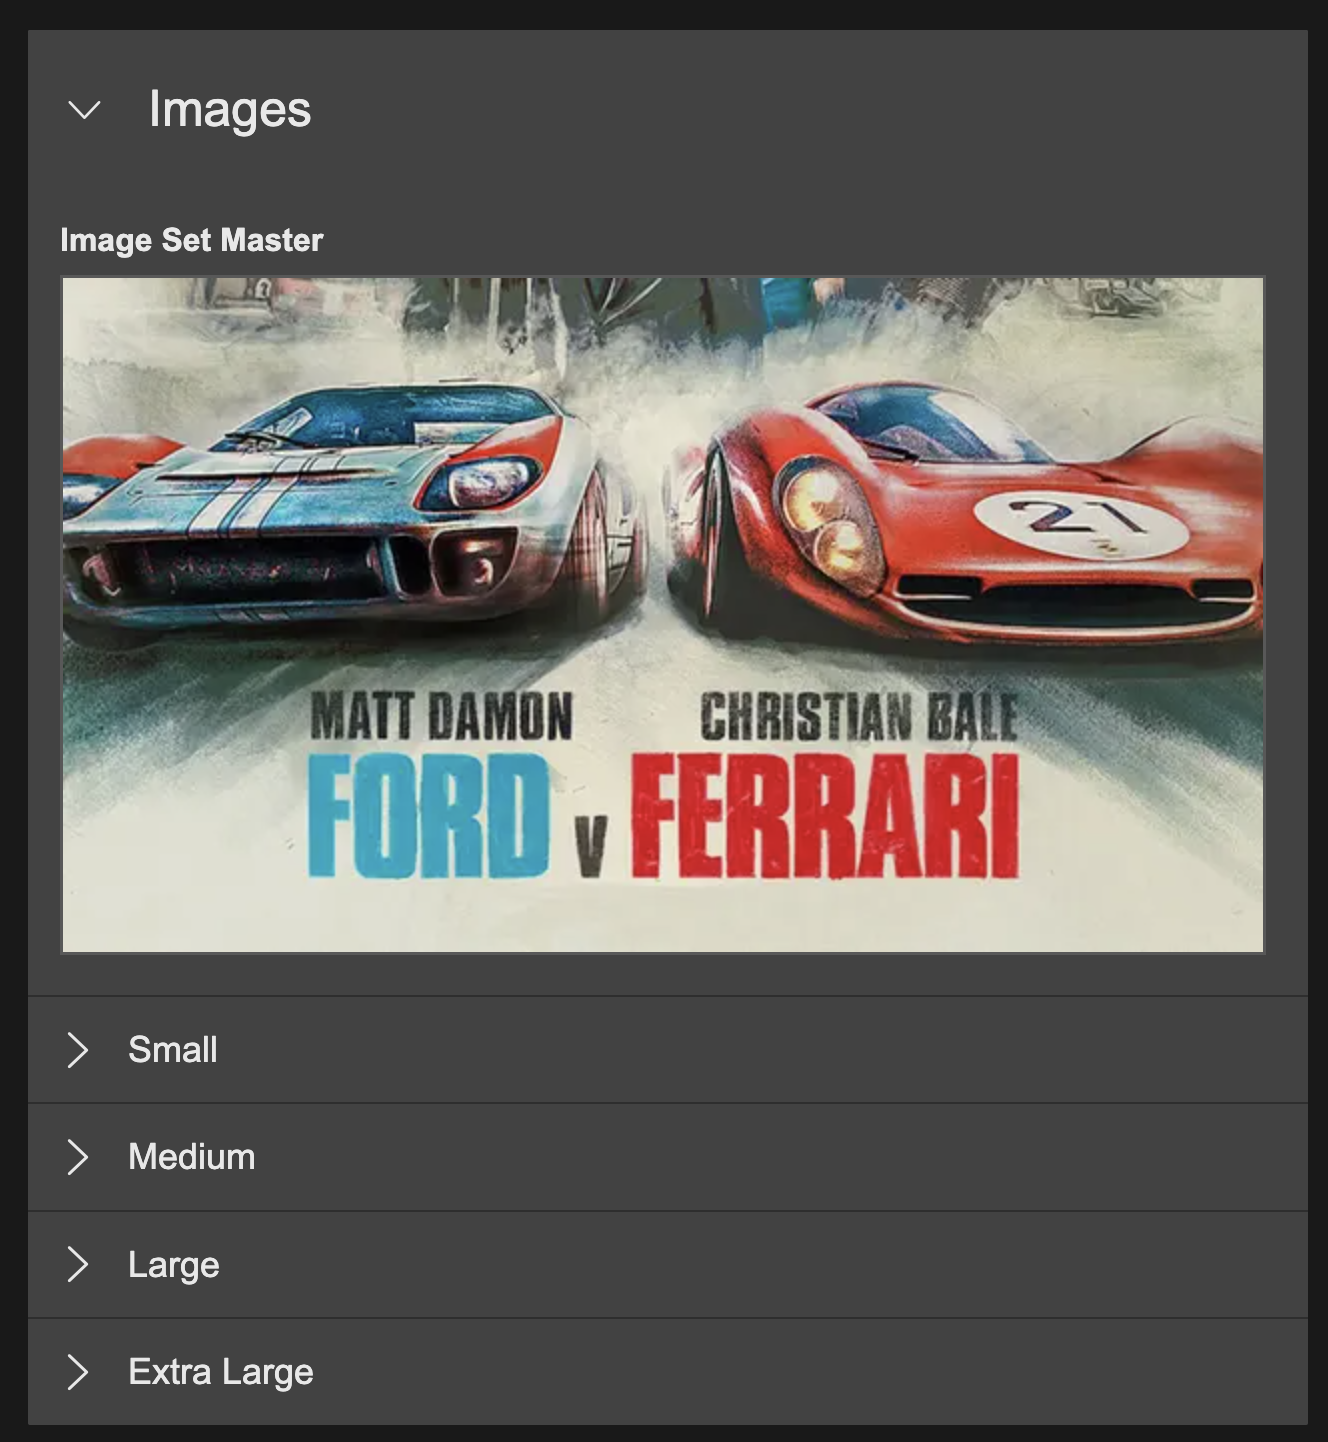
An Image Set Master contains a number of different sized child images
Updating the Master Image
To update the master image, simply drag and drop a new image over the existing image. The image set master is a parent of the child image sizes, as such, updating the image set master will update all the related image sizes and crops.
- Locate the Image Set Master section in the "Images" section.
- Drag and drop the new image onto the Image Set Master section.
- This will update all child cropped ratios with the new image.
Replacing a Cropped Ratio Image
To replace a specific cropped ratio image with a new image, follow these steps:
- Locate the desired cropped ratio in the Image Set.
- Drag and drop a new image file onto the specific cropped ratio image.
- This action will break the relationship with the parent Image Set Master, and the child crop will no longer be updated with the master image.

You can replace a child image size
Resetting a Cropped Ratio
To reinstate the relationship with the parent image set master and reset a select image size to the current image set master, follow these steps:
- Mouse over the crop that you want to reset.
- Click on the "Reset" button.
- This will reinstate the relationship with the parent Image Set Master and revert the image to the master image.
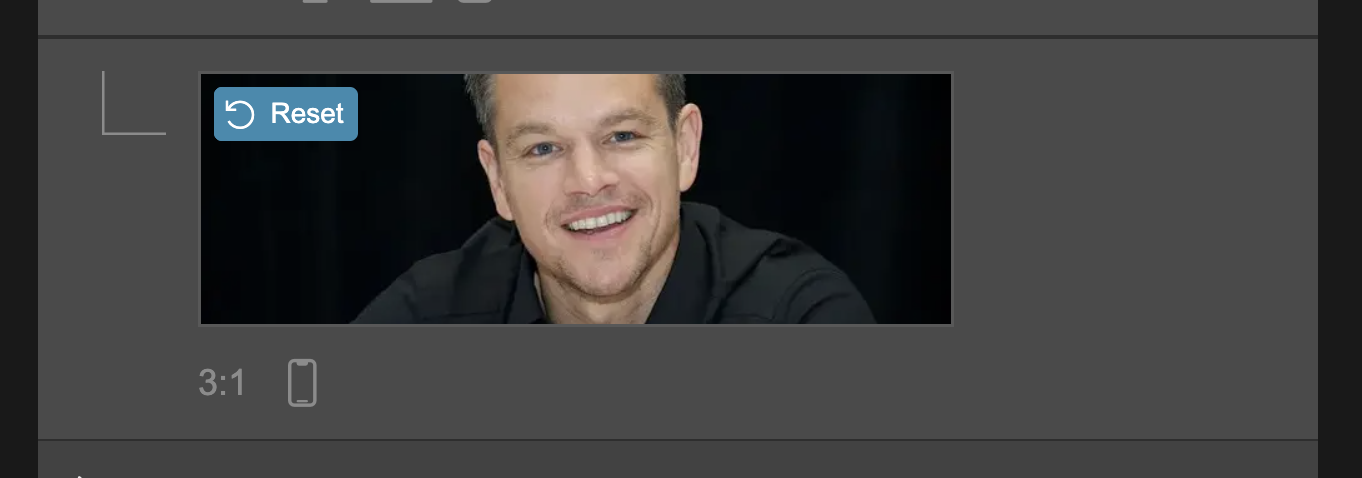
Click reset to reset the cropped image back to the master image
Links
You can create three types of links: External Links, Internal Links, and System Links.
- External links require a URL to link to an external destination.
- Internal links can point to a page, collection, or product within your service.
- System links target pages that are not created by you, including Registration, sign-in, etc.
Creating a Link
- To create a link, click on the Link section to expand it.
- Select the link type from the Link Type drop-down menu; the way of providing a link is different depending on the selected Link Type, as outlined below.
- Click the Open In New Tab toggle switch to turn it on or off. When switched on, if a banner is clicked the consumer website, the destination will be opened in a new tab. When switched off, the destination will be opened in the same browser tab.

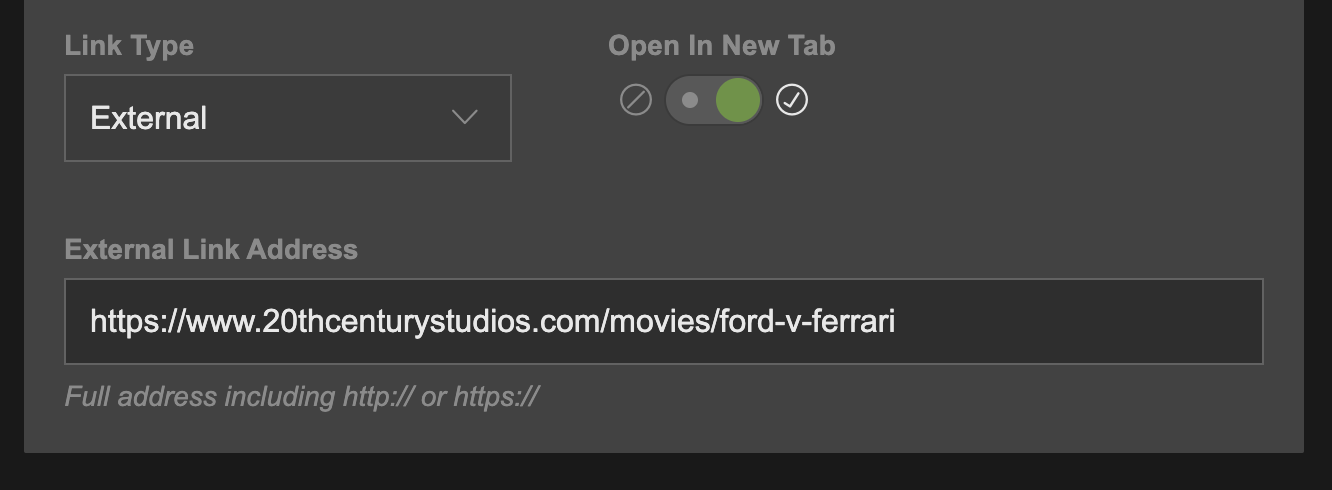
External Links
- Select External Links from the Link Type drop-down menu.
- The External Link Address text field will appear.
- Enter the web address of your choice into the text field.
It is important to include the protocol which is the http:// or https:// part of the URL
Internal Links
- Select Internal Links from the Link Type drop-down menu.
- The internal link drag and drop area will appear.
- Navigate to the page, collection, or product in the left menu that you wish to link the banner to, and drag and drop it onto the drag and drop area.

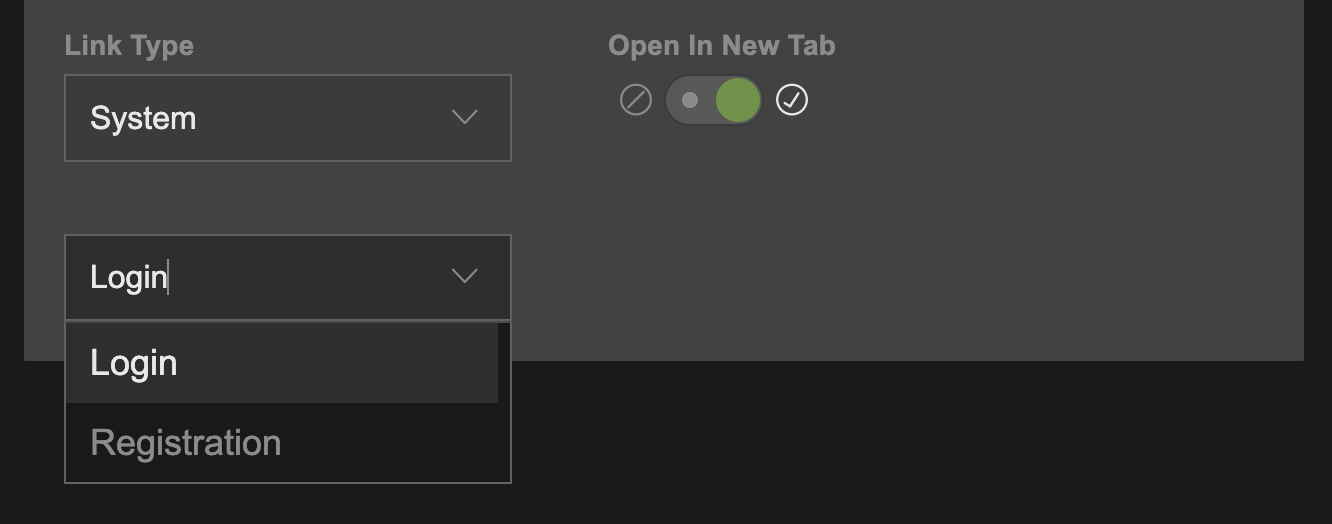
System Links
- Select System Links from the Link Type drop-down menu.
- The drop-down menu containing system pages will appear.
- Select the system page you wish the banner ad to link to.
Updated 8 months ago