Content Windows
Schedule your content to change over defined periods of time
Content Windows provide a dynamic way to modify and schedule the content on your page, be it collections, labels, or other elements, over a specified timeframe.
Creating Content Windows
A new collection is created with a Content Window by default. However, you can add additional windows.
- Click the Content Windows section to expand it
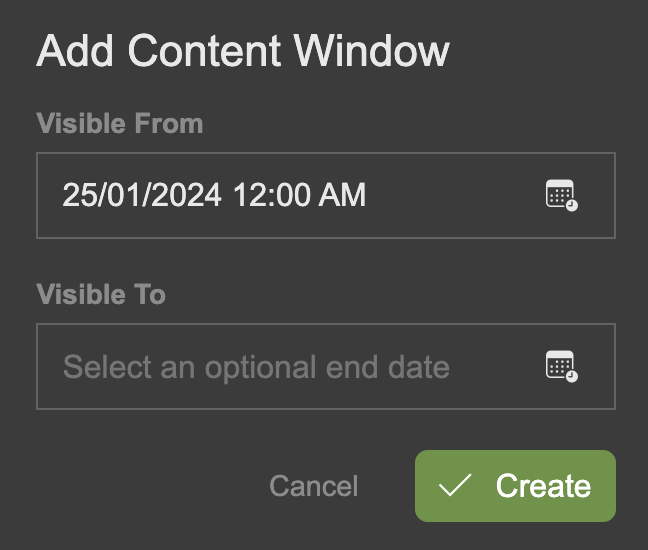
- Click on an empty section of the timeline. This will bring up the Content Window dialogue.
- Set a Visible From date/time and an optional Visible To date/time. This will define how long the content window lasts for.
- Click 'Update' to create the new Content Window with the configured start and end dates.
- The Content Window 'segment' is added to the timeline.
When a new content window is created, it automatically duplicates the content from the window you currently have selected. For instance, if you're on the June window and create a new one for July, the July window will initially contain the same content as the June window. You can then update it as needed.
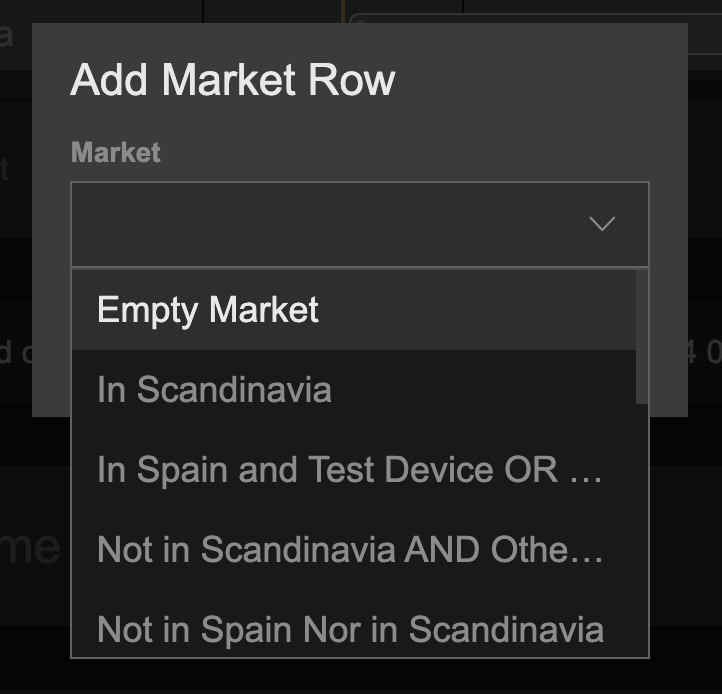
Adding Markets
You can target Content Windows at different Markets, enabling you to provide different page layouts, collection content etc to different user groups.
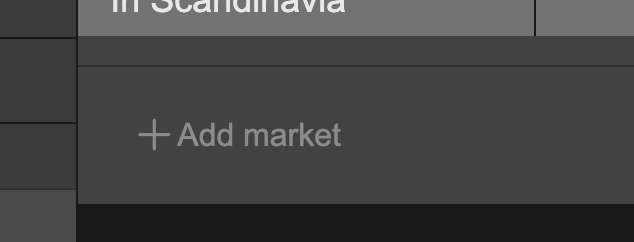
- At the bottom left of the Content Windows section, click +Add Market
- In the subsequent dialogue overlay, select your market of choice from the drop down select menu of existing markets.
- Click Add
- An empty timeline row is added to the Content Windows section with the name of the market to the left of it.
- To add content windows to the new market timeline, follow the directions above, under Creating Content Windows
Editing Content Window Dates
- Double click a Content Window.
- In the subsequent dialogue overlay, edit the Available From and Available To values.
- Click Udate
Switching Between Content Windows
Switching between content windows allows you to edit the content for each window.
- Single click a Content Window. Notice how the selected Content Window 'segment' becomes highlighted with a white outline.
- You can now make edits to the content of the selected Content Window.
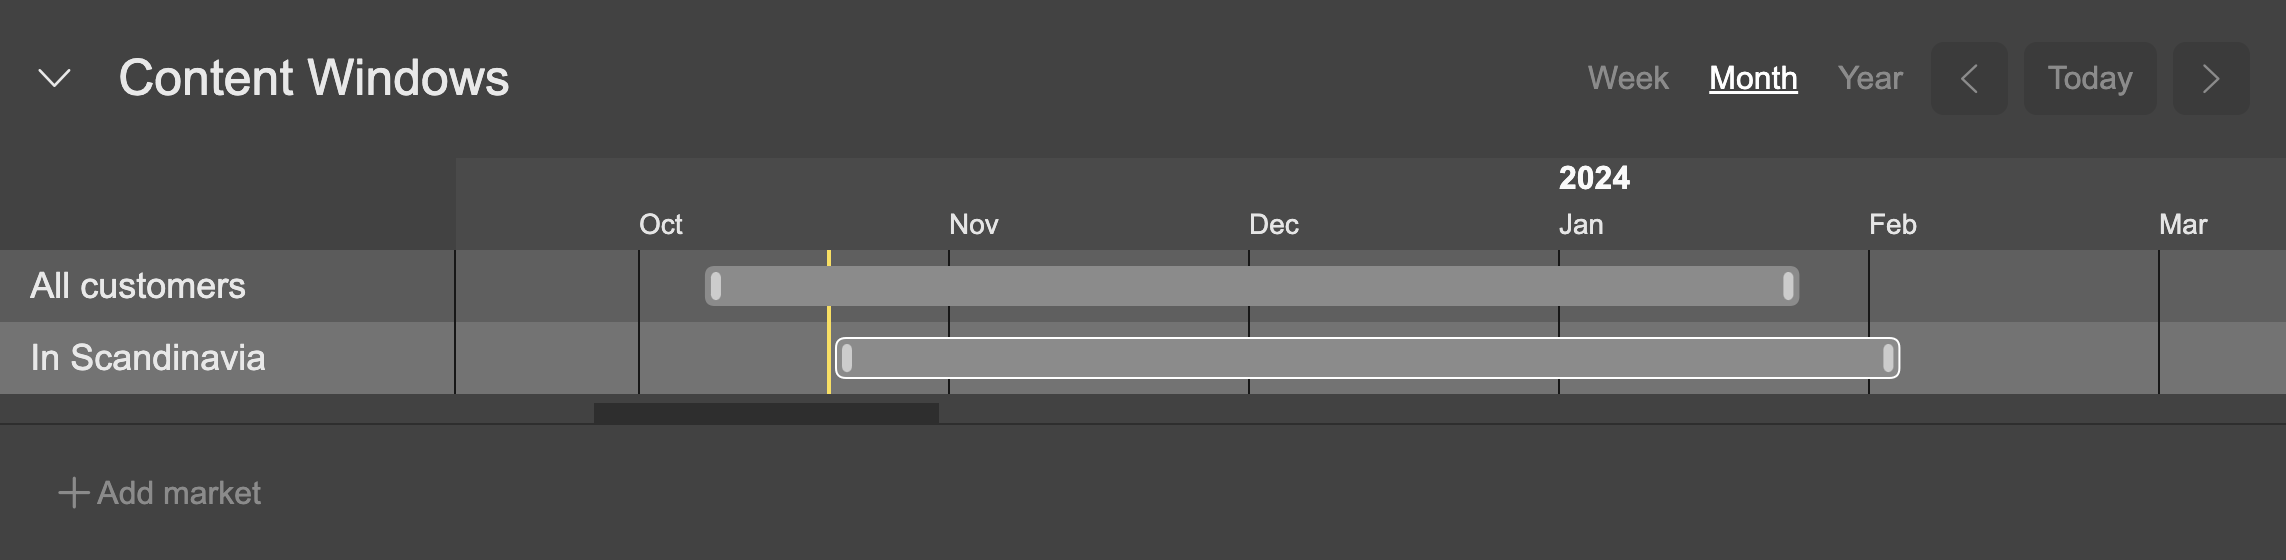
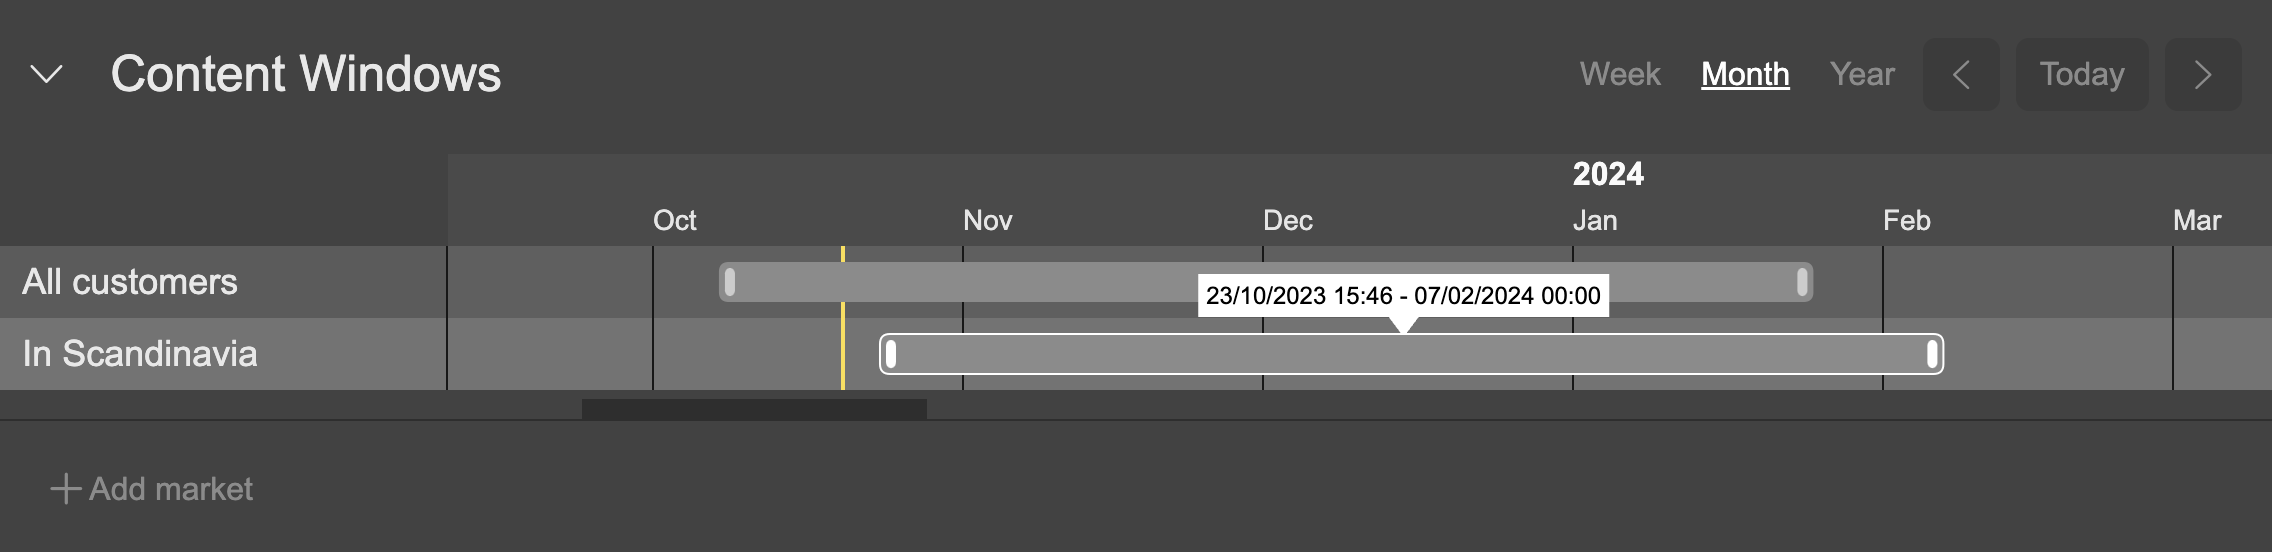
- The start and end date/time is displayed for the selected content window (as you can see in the example below).
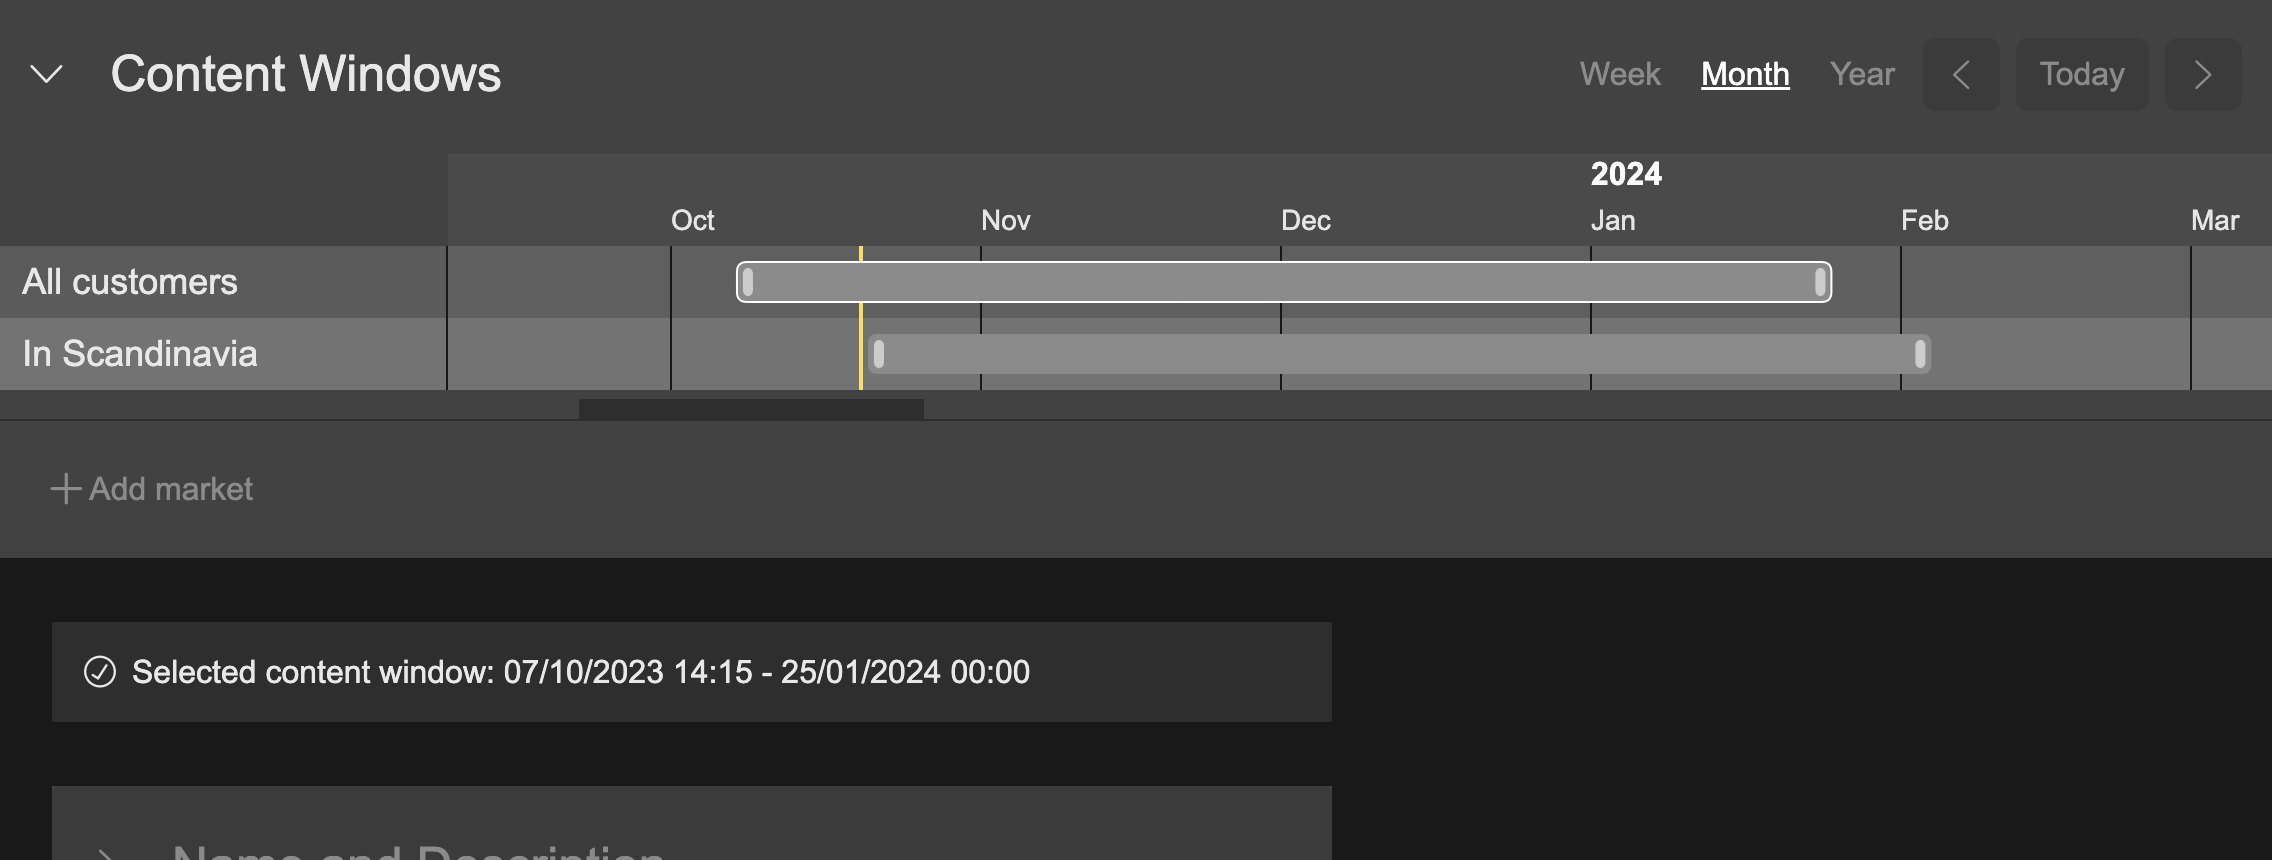
Content Window - Market A (All Customers ) selected
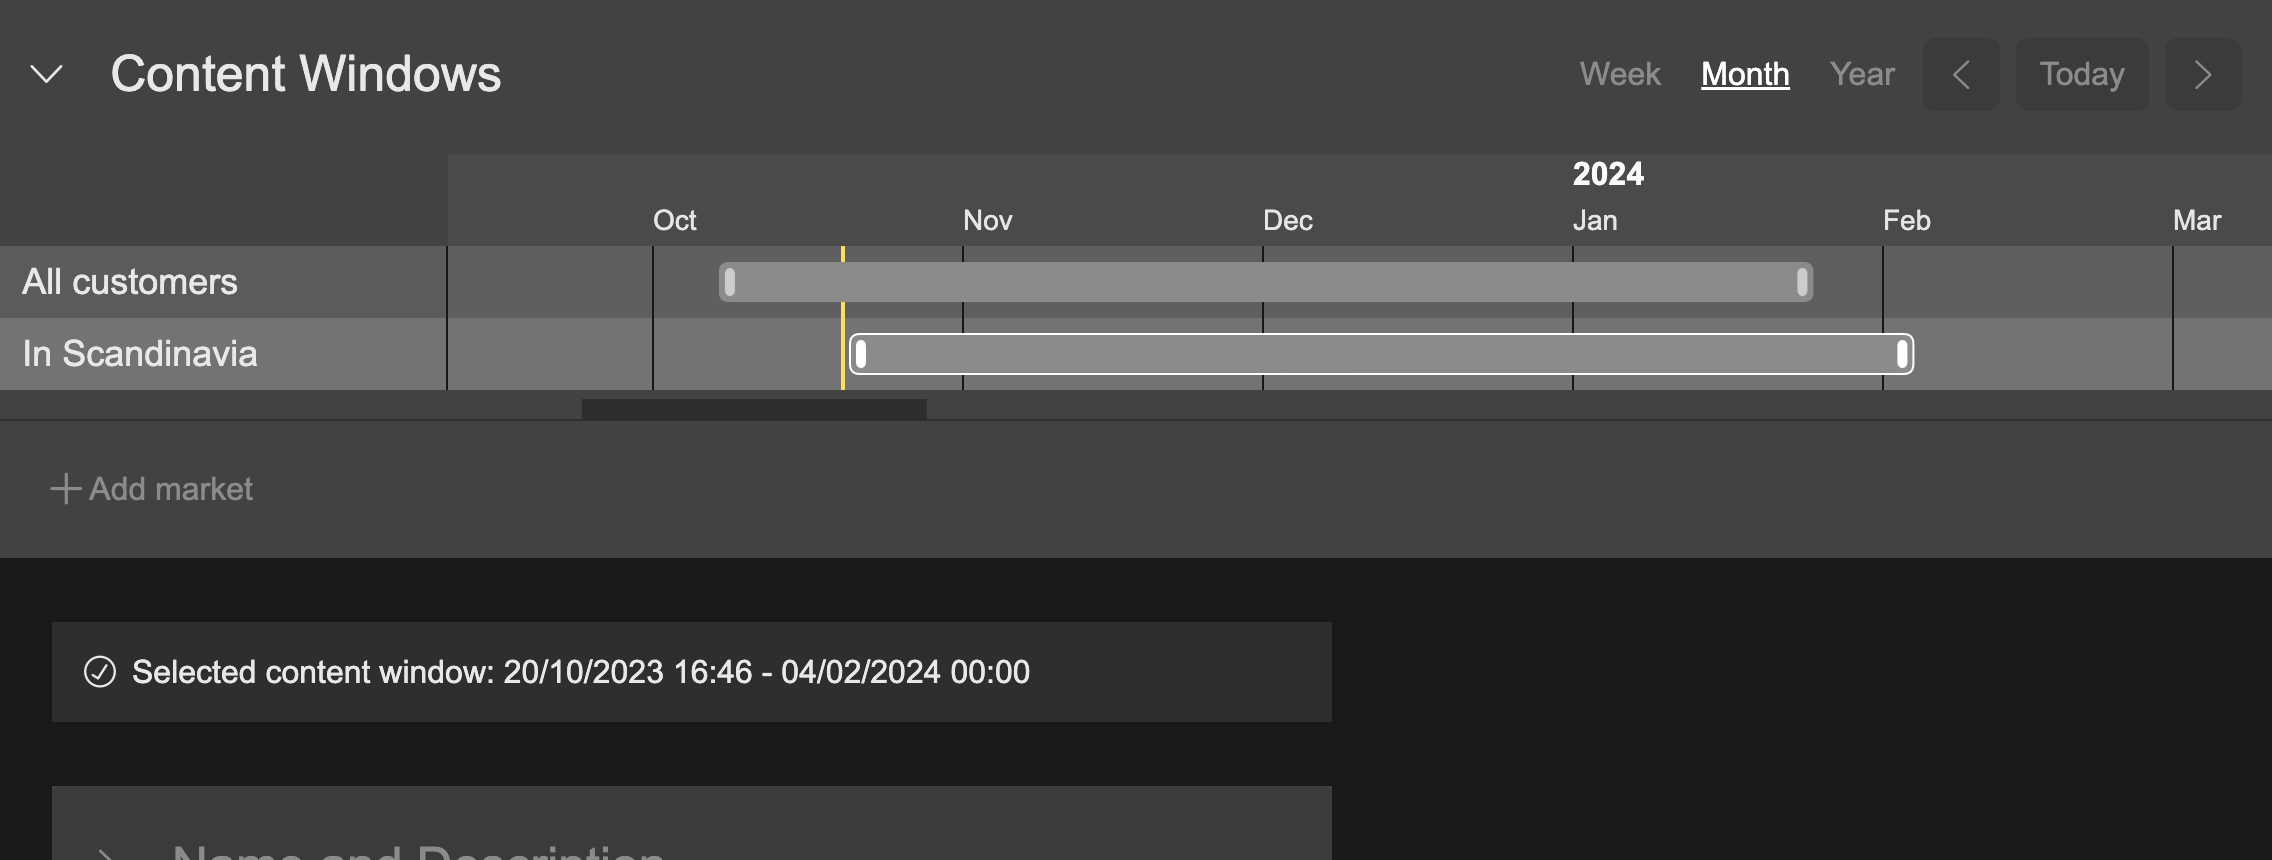
Content Window - Market B (In Scandinavia) selected
Any edits made to your content, whether it is the name of a page, the order of products in a collection or, the layout of a page will only affect the selected window. The content of other windows will remain the same.
Deleting a Content Window
- Double click a Content Window segment.
- In the subsequent dialogue overlay, click the Delete content window button at the bottom of the panel.
- The Content Window is deleted.

Any content changes you made for the deleted content window will be lost
Editing Content Windows Via the Timelines
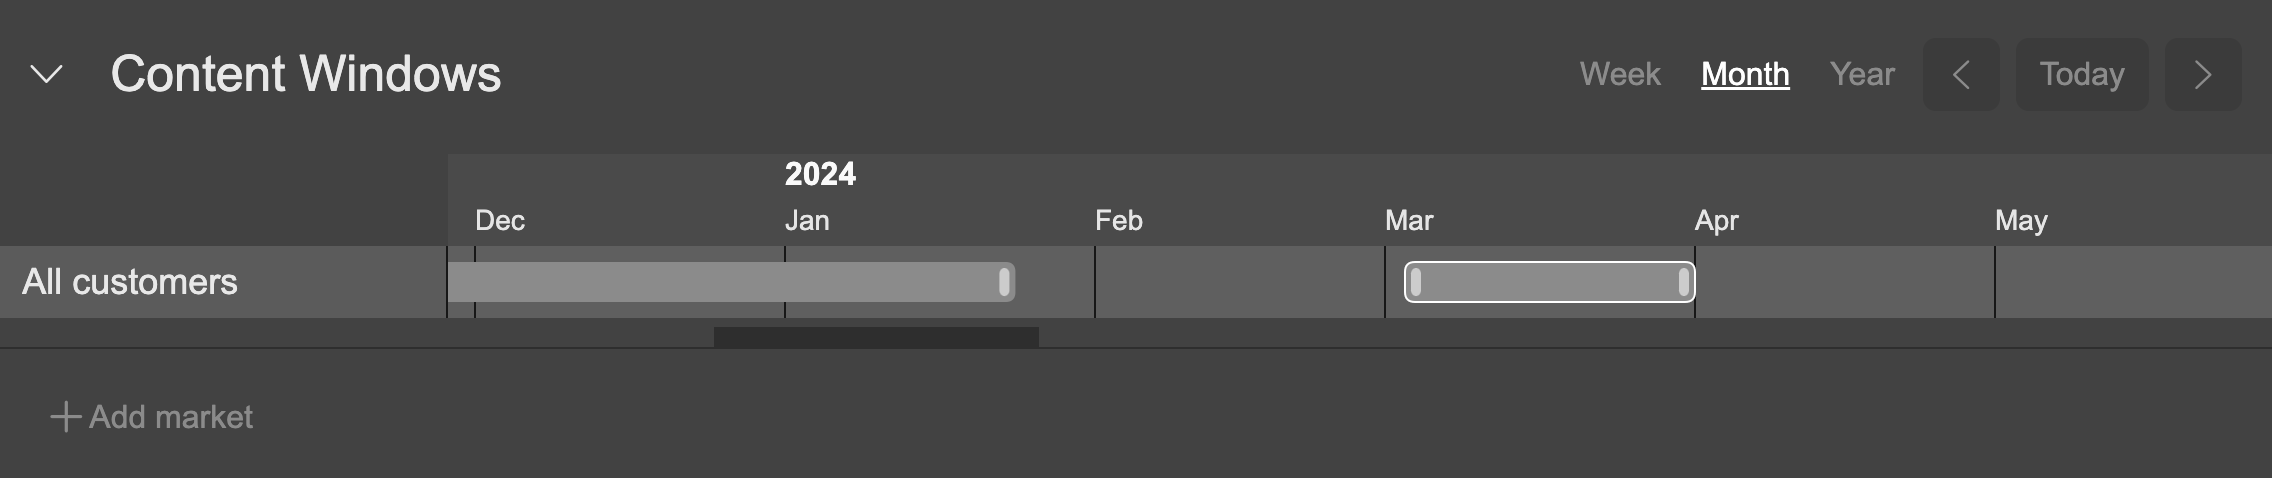
The the start and end dates of Content Windows can be edited directly on the timeline by dragging, extending and contracting the Content Window 'segments'.
Changing the length of a window
- Mouseover either end of the Content Window 'segment'. The mouse pointer will change to a left/right arrow.
- Drag the end of the segment left or right along the timeline to either extend or contract the width of the segment.
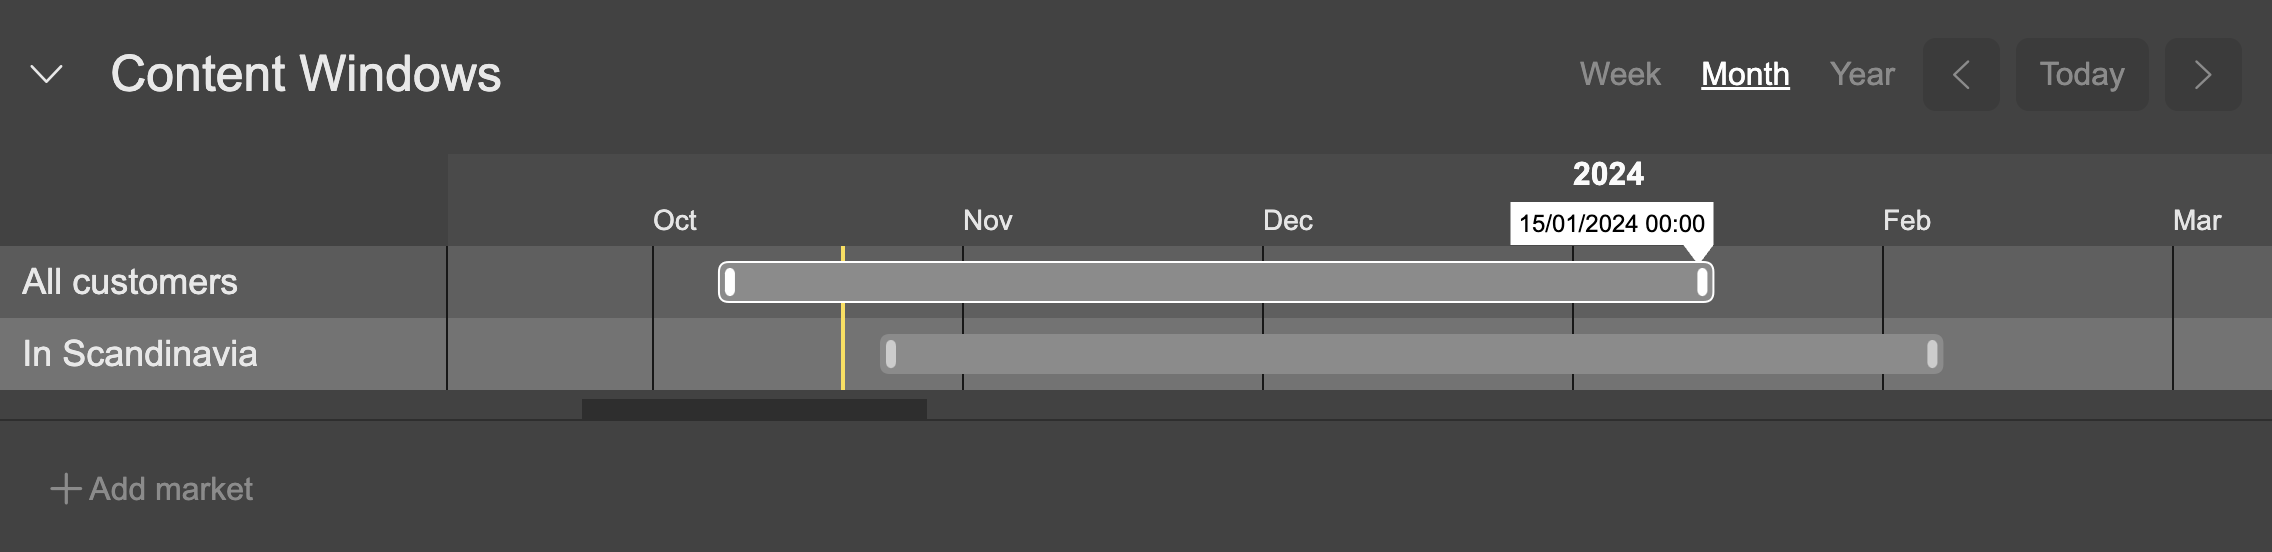
As you drag the end of the segment, a tooltip will appear showing you the updated date/time.
Dragging a content window to a new timeline position
To retain the length of the Content Window, but change the start/end dates, you can simply drag the whole Content Window 'segment' to a new position.
- Mouseover a Content Window 'segment' and click to grab it.
- Drag it left or right along the timeline to shift it to a new position.
As you drag the segment, a tooltip will appear showing you the updated start and end date/time
Updated 8 months ago